Here it is: Part 1 of the Tote Tuesday Tutorial series!
This tutorial is how to make the basic body of the tote. Measurements I list here can be modified if you would like a tote that is wider or deeper.
Materials:
STEP 1:
Cut:
This tutorial is how to make the basic body of the tote. Measurements I list here can be modified if you would like a tote that is wider or deeper.
Materials:
- 1/2 yard of fabric you would like to use for outside (heavier weight fabric will make a sturdier bag but will be more difficult to sew through, if you use regular weight cotton fabric, like I did here see note under interfacing)
- 1/2 yard of interfacing (if you use a regular cotton weight fabric for outside consider using a heavier interfacing than if you are using decorator weight fabric)
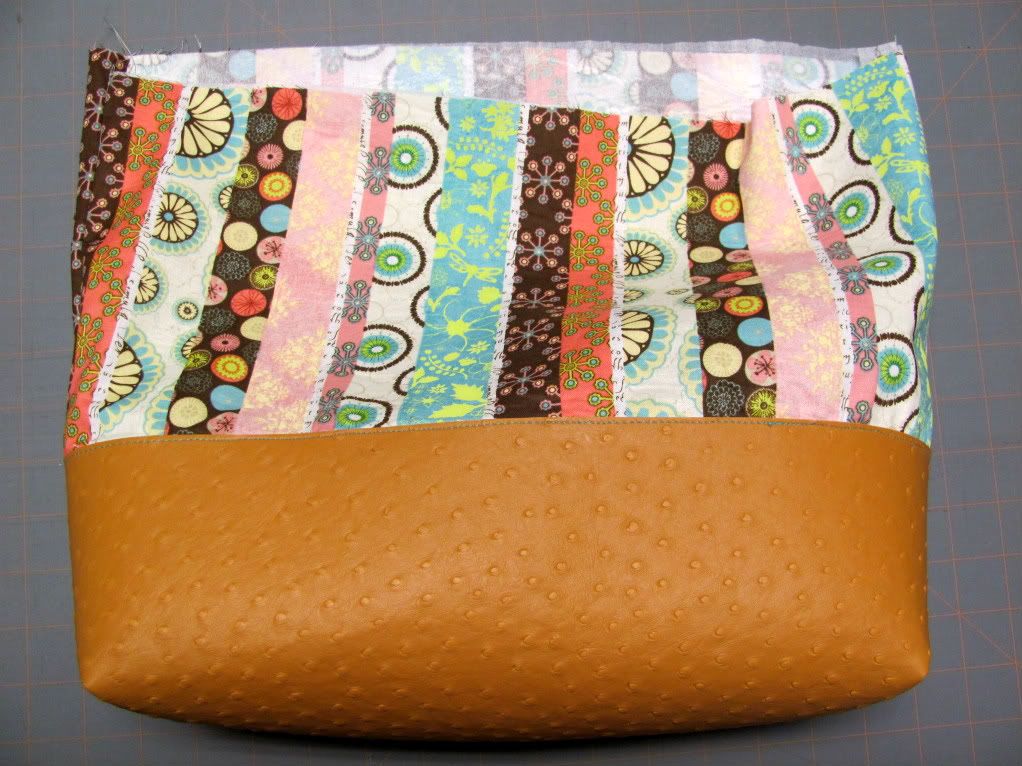
- 12"x18" piece of accent fabric along tote bottom (here I use a piece of faux-leather, you could also use canvas, denim, etc. the thicker/heavier the fabric the more rigid the bottom shape of the bag will be)
STEP 1:
Cut:
- 1-28"x18" piece of the fabric you will be using for the outside of your tote
- 1-28"x18" piece of interfacing
- 1-12"x18" piece of accent fabric (optional)
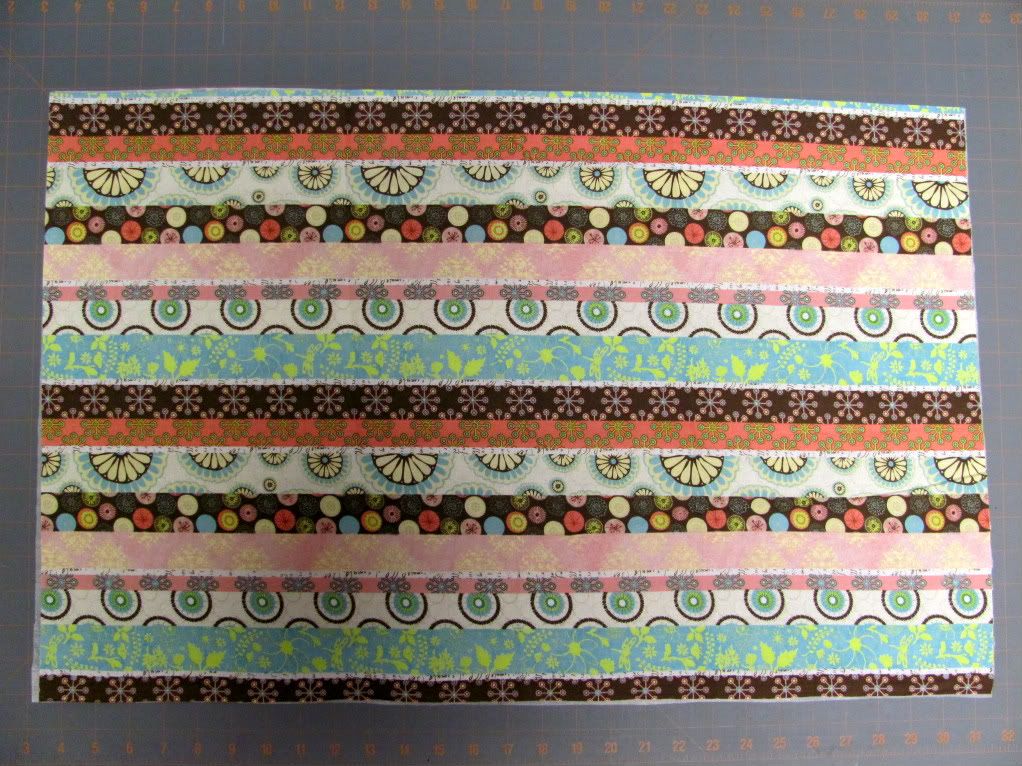 |
| 28inchesx18inches: outside fabric |
- Iron interfacing to wrong (back/un-printed/inside) side of fabric using for the body of the bag.
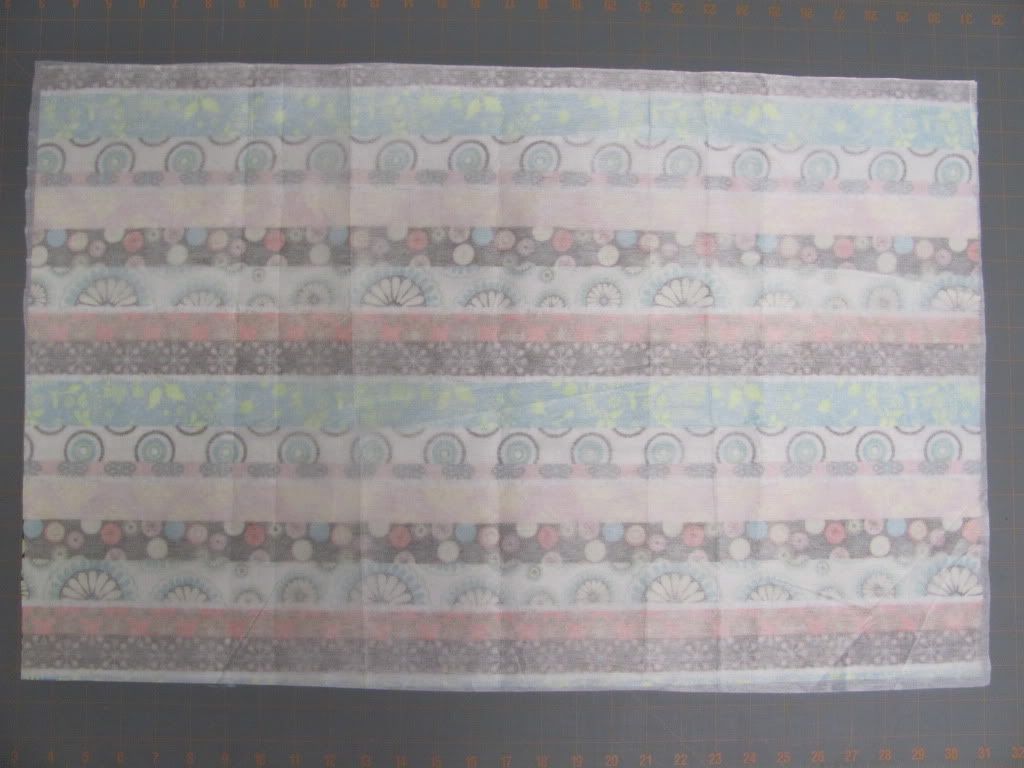 |
| Interfacing ironed to wrong side of fabric. |
STEP 3:
- Mark the center of the long edges of your body fabric. In the case of this bag the middle is at 14". I put a mark on both long edges of the piece.
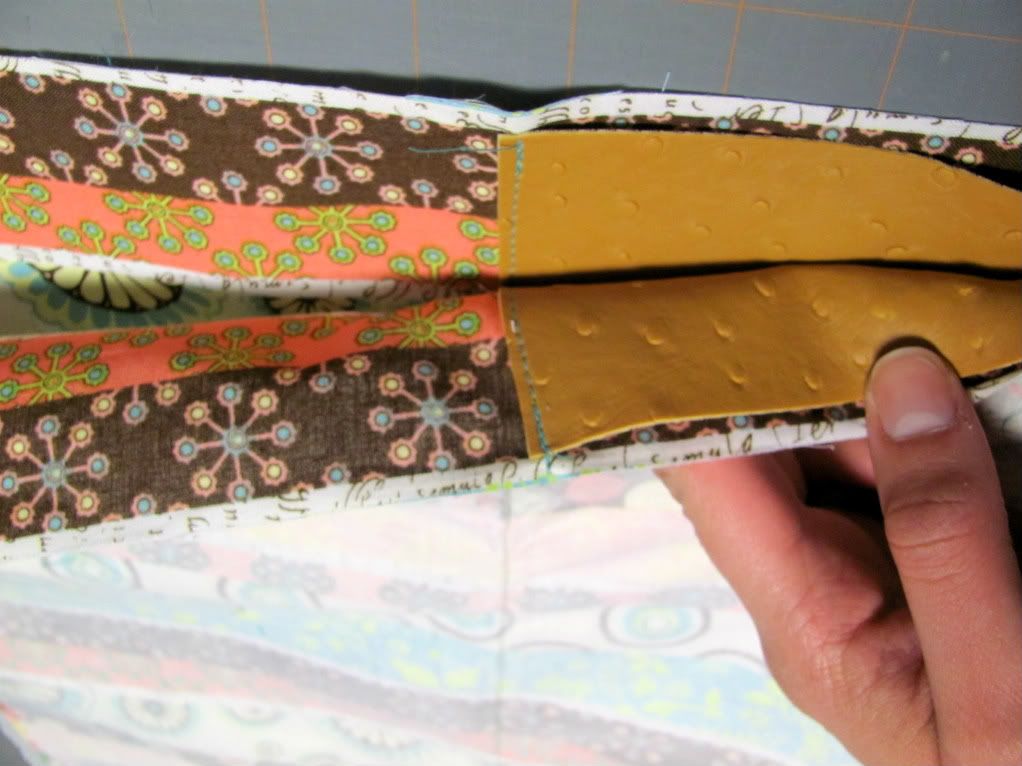
- Also mark the middle of the short edges of the accent fabric. In the measurements I give here for the piece 6" is the middle. (If you are skipping the accent fabric you not need to complete the steps where I've indicated the accent fabric.)
 |
| Centered accent fabric (faux leather) on body fabric. |
STEP 4:
(Skip whole step if not adding accent fabric)
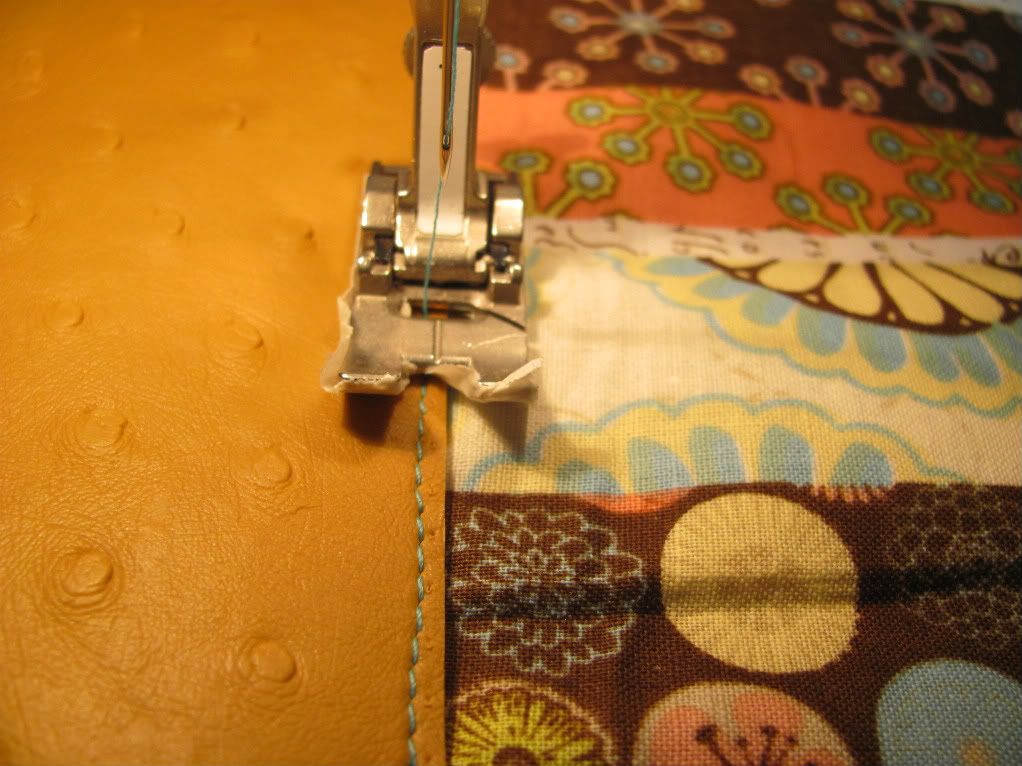
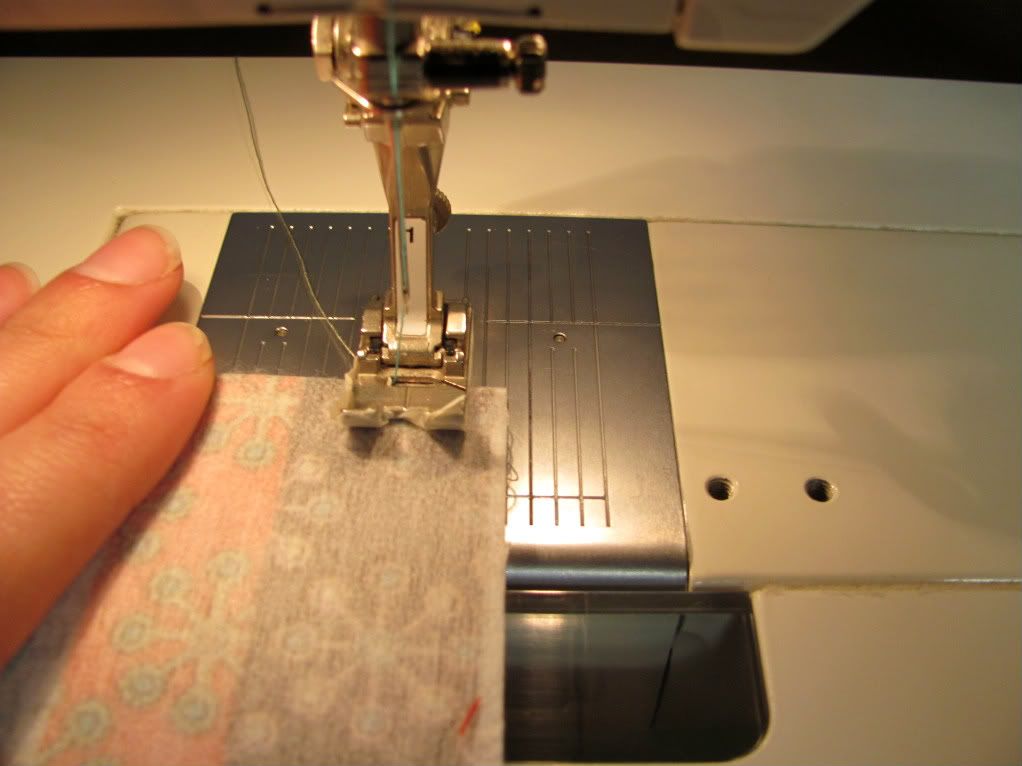
- You don't want to use needles to pin the faux leather in place as the pin marks won't disappear after you remove the pins. I used tape to tape the one side in place and then removed the tape along the edge as I sewed.
- If you are using a cloth fabric as the accent fabric you might have to edge finish it before you sew it in place and then you can sure pin it instead of using the tape.
- I then use a longer stitch length for working the the faux leather in order to sew. Ideally when sewing faux leather/oilcloth/plastic coated fabric it's helpful to use a walking foot. I don't have one so I put masking tape on the bottom of my presser foot and it is a bit easier to sew that way (otherwise it sort of sticks to the foot).
- I stitched about 1mm away from the edge of my accent fabric, as shown in picture below.
- Sew the other side of the accent fabric in the same direction as the first: start sewing from the same side that you sewed the 1st side this means you will be lining the accent fabric edge up with the opposite edge of the presser foot.
Step 5:
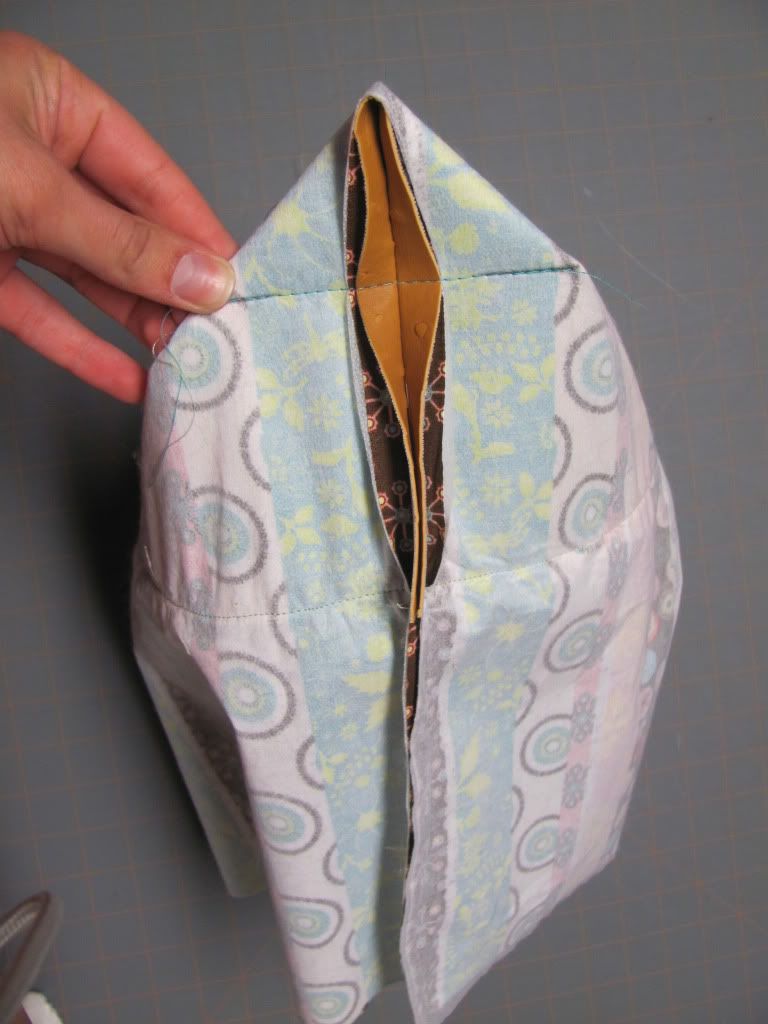
- Fold the fabric in half.
- If you are using the accent fabric you need to match up the edges of the accent fabric as shown in second picture.
 |
| Fold fabric in half. |
 |
| Lining up accent fabric edges. |
STEP 6:
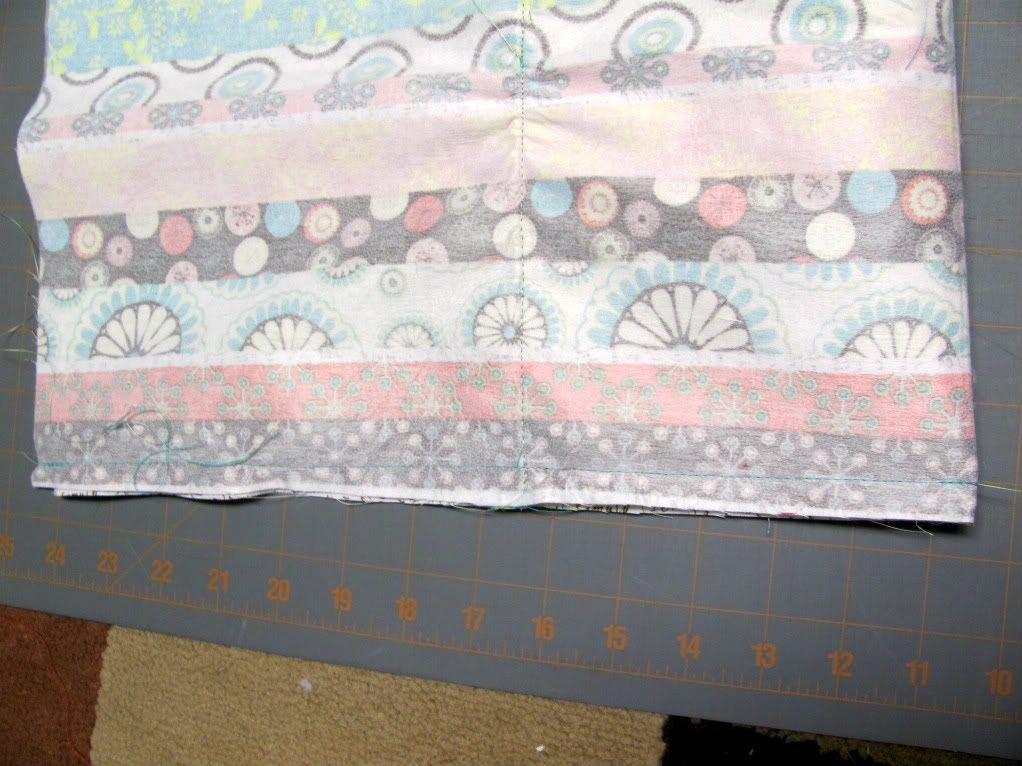
- Starting with the folded edge sew the side edges together. I used a 1/2" seam allowance.
 |
| Sew side edges together with a 1/2" seam allowance. |
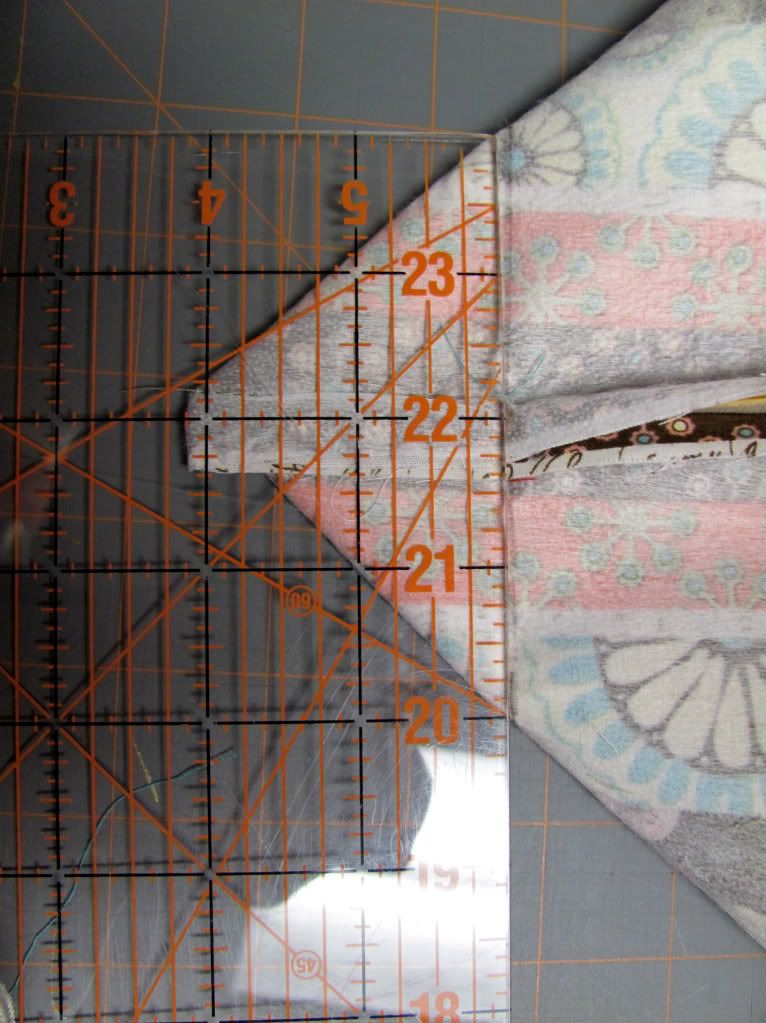
- Taking one corner pinch it so that the side seam creates a point and matches up with what would be the center of the long strip of fabric. (The center of the fabric, as it was to begin with before the sides were closed will be the center of the bottom of the bag.) If this is unclear please leave a comment and I'll try to explain it better. I have given a few photos in hopes that they help illustrate the concept.
 |
| Pinching side seam and bottom to create point. |

STEP 8:
- Laying the pinched corner flat mark how wide you want your bottom to be.
- I marked far enough up the bag so that there was 2" on either side of the side seam. As shown below. (Again if this step is unclear please comment and I'll try to explain it better!)
- Repeat marking the other corner of the bag.

STEP 9:
- Sew along the lines you just marked on either side of the bag.
 |
| Sew along line just marked. |
 |
| When done sewing corners they should look like these photos. |
 |
| After sewing corners: from side. |
- Turn bag inside out. There you have it! The outside of your tote!
Next Week on Tote Tuesday:
Next week I'll post on how to make the lining of the bag (you construct it the same way only without the accent fabric!) although we will add a basic pocket to the lining along with a zippered pocket. For all you who detest putting in zippers this may be the easiest zipper you've ever put in!
Materials needed for next week (in case you need to pick something up over the next week):
- 1/2 yard of fabric for tote lining
- 8-12" zipper depending upon how big you want your pocket opening to be. I usually use 8"
Hope you were able to follow along! Any constructive criticism is helpful as I am new to tutorial writing! Would love to see you back again next week for Part 2!

Linking Up Here:

That looks great with the leather added in. You make it look so easy:)
ReplyDelete